> For the complete documentation index, see [llms.txt](https://luw-ai.gitbook.io/luw.ai-studio/llms.txt). Markdown versions of documentation pages are available by appending `.md` to page URLs; this page is available as [Markdown](https://luw-ai.gitbook.io/luw.ai-studio/items-and-paint/placing-and-arranging.md).

# Placing and arranging

Drop items into a room, set them on tables and shelves, then select, move, turn, resize, copy and remove them in the 3D view or on the plan.

Getting furniture into Luw\.ai Studio takes one click. Getting it *right* is the part that takes a little longer: lining the sofa up with the wall, centring the rug, turning the desk towards the window, putting a lamp on the bedside table. This page covers both. Most of it works on the 2D plan as well as in the 3D view.

If you haven't picked an item yet, start with [Finding items](/luw.ai-studio/items-and-paint/finding-items.md).

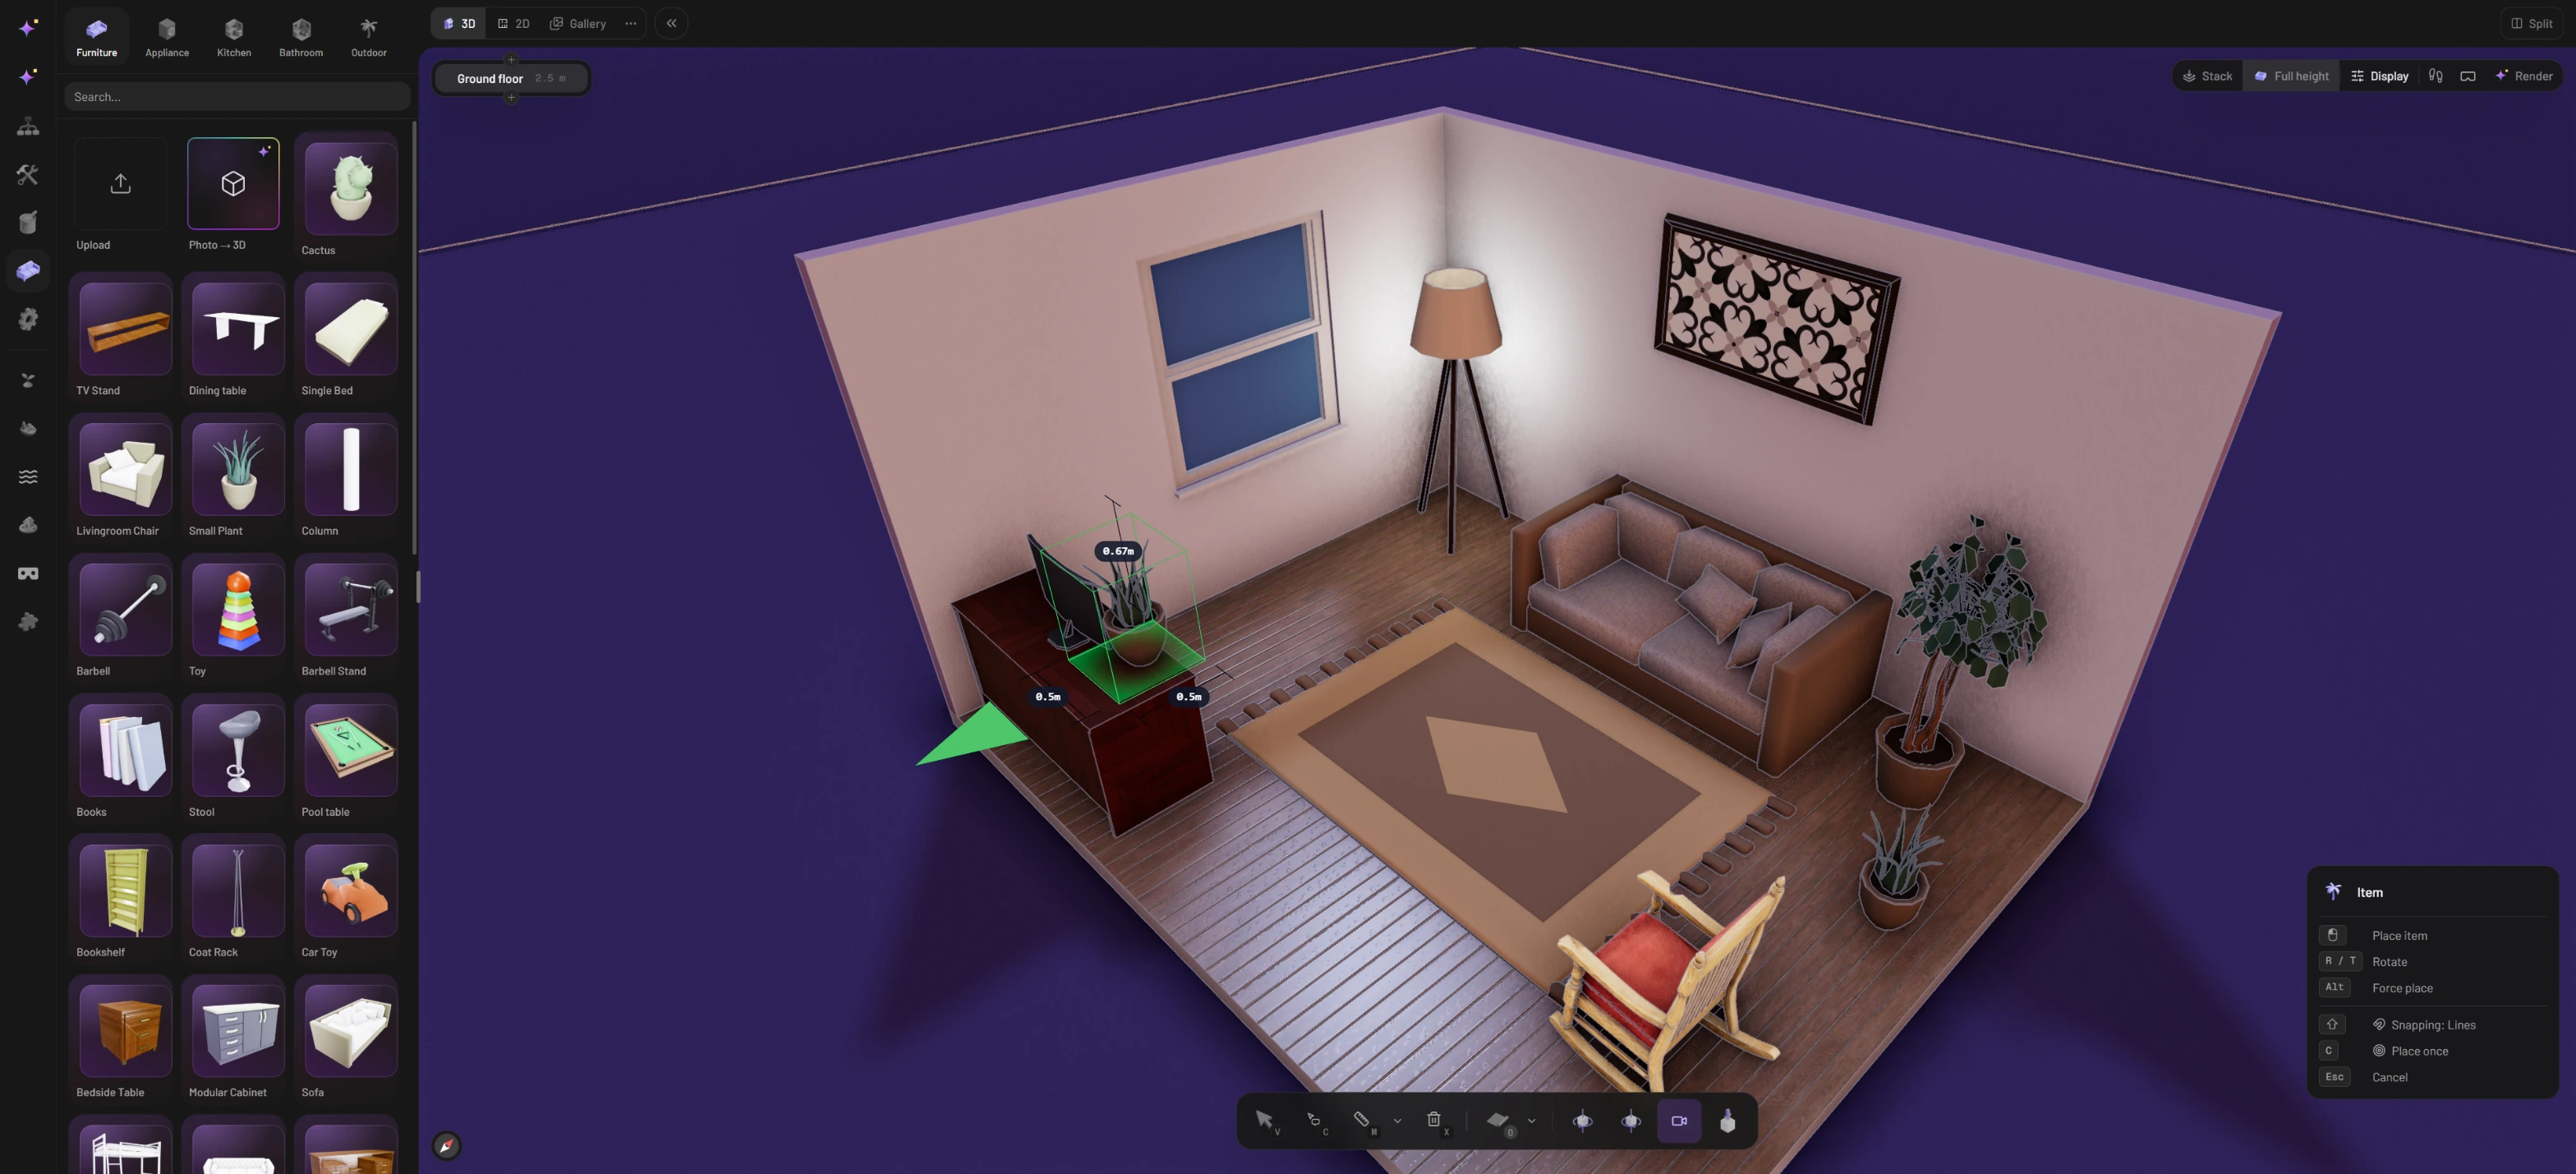
<figure><img src="https://1629954275-files.gitbook.io/~/files/v0/b/gitbook-x-prod.appspot.com/o/spaces%2F3c2lKXqxOtmrzgrQQpGP%2Fuploads%2Fgit-blob-96de88f29485f8fb9c977ce1206a78053163135f%2Fplacing-an-item.webp?alt=media" alt="A 1.99 m bookshelf following the cursor in front of the window, with a green footprint, size labels, a 1.37 m guide line and the Item panel of placement keys"><figcaption><p>While you place an item, its footprint and size follow the cursor, and the panel on the right lists the keys you can use.</p></figcaption></figure>

## Place an item

{% stepper %}
{% step %}

### Pick it from the catalog

Click a tile in the **Items** tab (press `F` to open the tab). The item attaches itself to your cursor.
{% endstep %}

{% step %}

### Find the spot

Move over the scene. The preview shows the item's outline and footprint along with live size labels, so you can judge the gaps to the walls and to other furniture.
{% endstep %}

{% step %}

### Click to drop it

Left-click to place the item. Press `Esc`, or right-click, to give up without placing anything.
{% endstep %}
{% endstepper %}

The hint panel at the side of the view keeps the controls in front of you while you place:

| Key                 | What it does                                                       |
| ------------------- | ------------------------------------------------------------------ |
| `Left click`        | Place the item                                                     |
| `R` / `T`           | Turn the preview 45° one way or the other                          |
| `Shift` (tap)       | Switch the snapping mode: **Lines**, **Grid** or **Off**           |
| `Ctrl` (tap)        | In **Grid** mode, change the grid step: 0.50, 0.25, 0.10 or 0.05 m |
| `C`                 | Switch between **Place once** and **Place multiple**               |
| `Alt`               | Force place, even where the preview turns red                      |
| `Esc` / right click | Cancel                                                             |

**Lines** is the default for furniture: the item catches alignment lines from walls and neighbouring objects instead of jumping across a grid. Switch to **Grid** when you want items to land on even steps, or **Off** for completely free placement. You can also click the snapping chip in the hint panel instead of pressing the key.

### Place several copies in a row

To put down six dining chairs or a row of plants, change the **Place once** chip to **Place multiple**, either by clicking it or by pressing `C`. Each click now drops another copy and the item stays on your cursor until you press `Esc`.

### Wall and ceiling items

If a tile carries a wall or ceiling badge, the item looks for that surface. A picture, mirror or thermostat slides along the wall you point at; a ceiling lamp, fan or smoke detector sticks to the ceiling. All other items land on the floor, or on a surface such as a table (see below).

## Placement warnings

The Studio checks floor items against the rooms around them. If an item stands in the space a door needs to open, or is too big for its room whichever way you turn it, the hint panel shows a warning marked **!**, both during placement and whenever you move the item later:

* **Blocks the door to** *room name* (or **Blocks a door**)
* **Too large for** *room name*, with the item's size compared with the room's

The same warning stays at the top of the item's panel after you've placed it. It's advice, not a block: you can still leave the item there. Items standing on a table, a shelf or a wall aren't checked. When [Archiagent.ai](/luw.ai-studio/luw.ai-ai-tools/archiagent.md) furnishes a room, it runs the same check and keeps clear of doors.

## Put items on top of other items

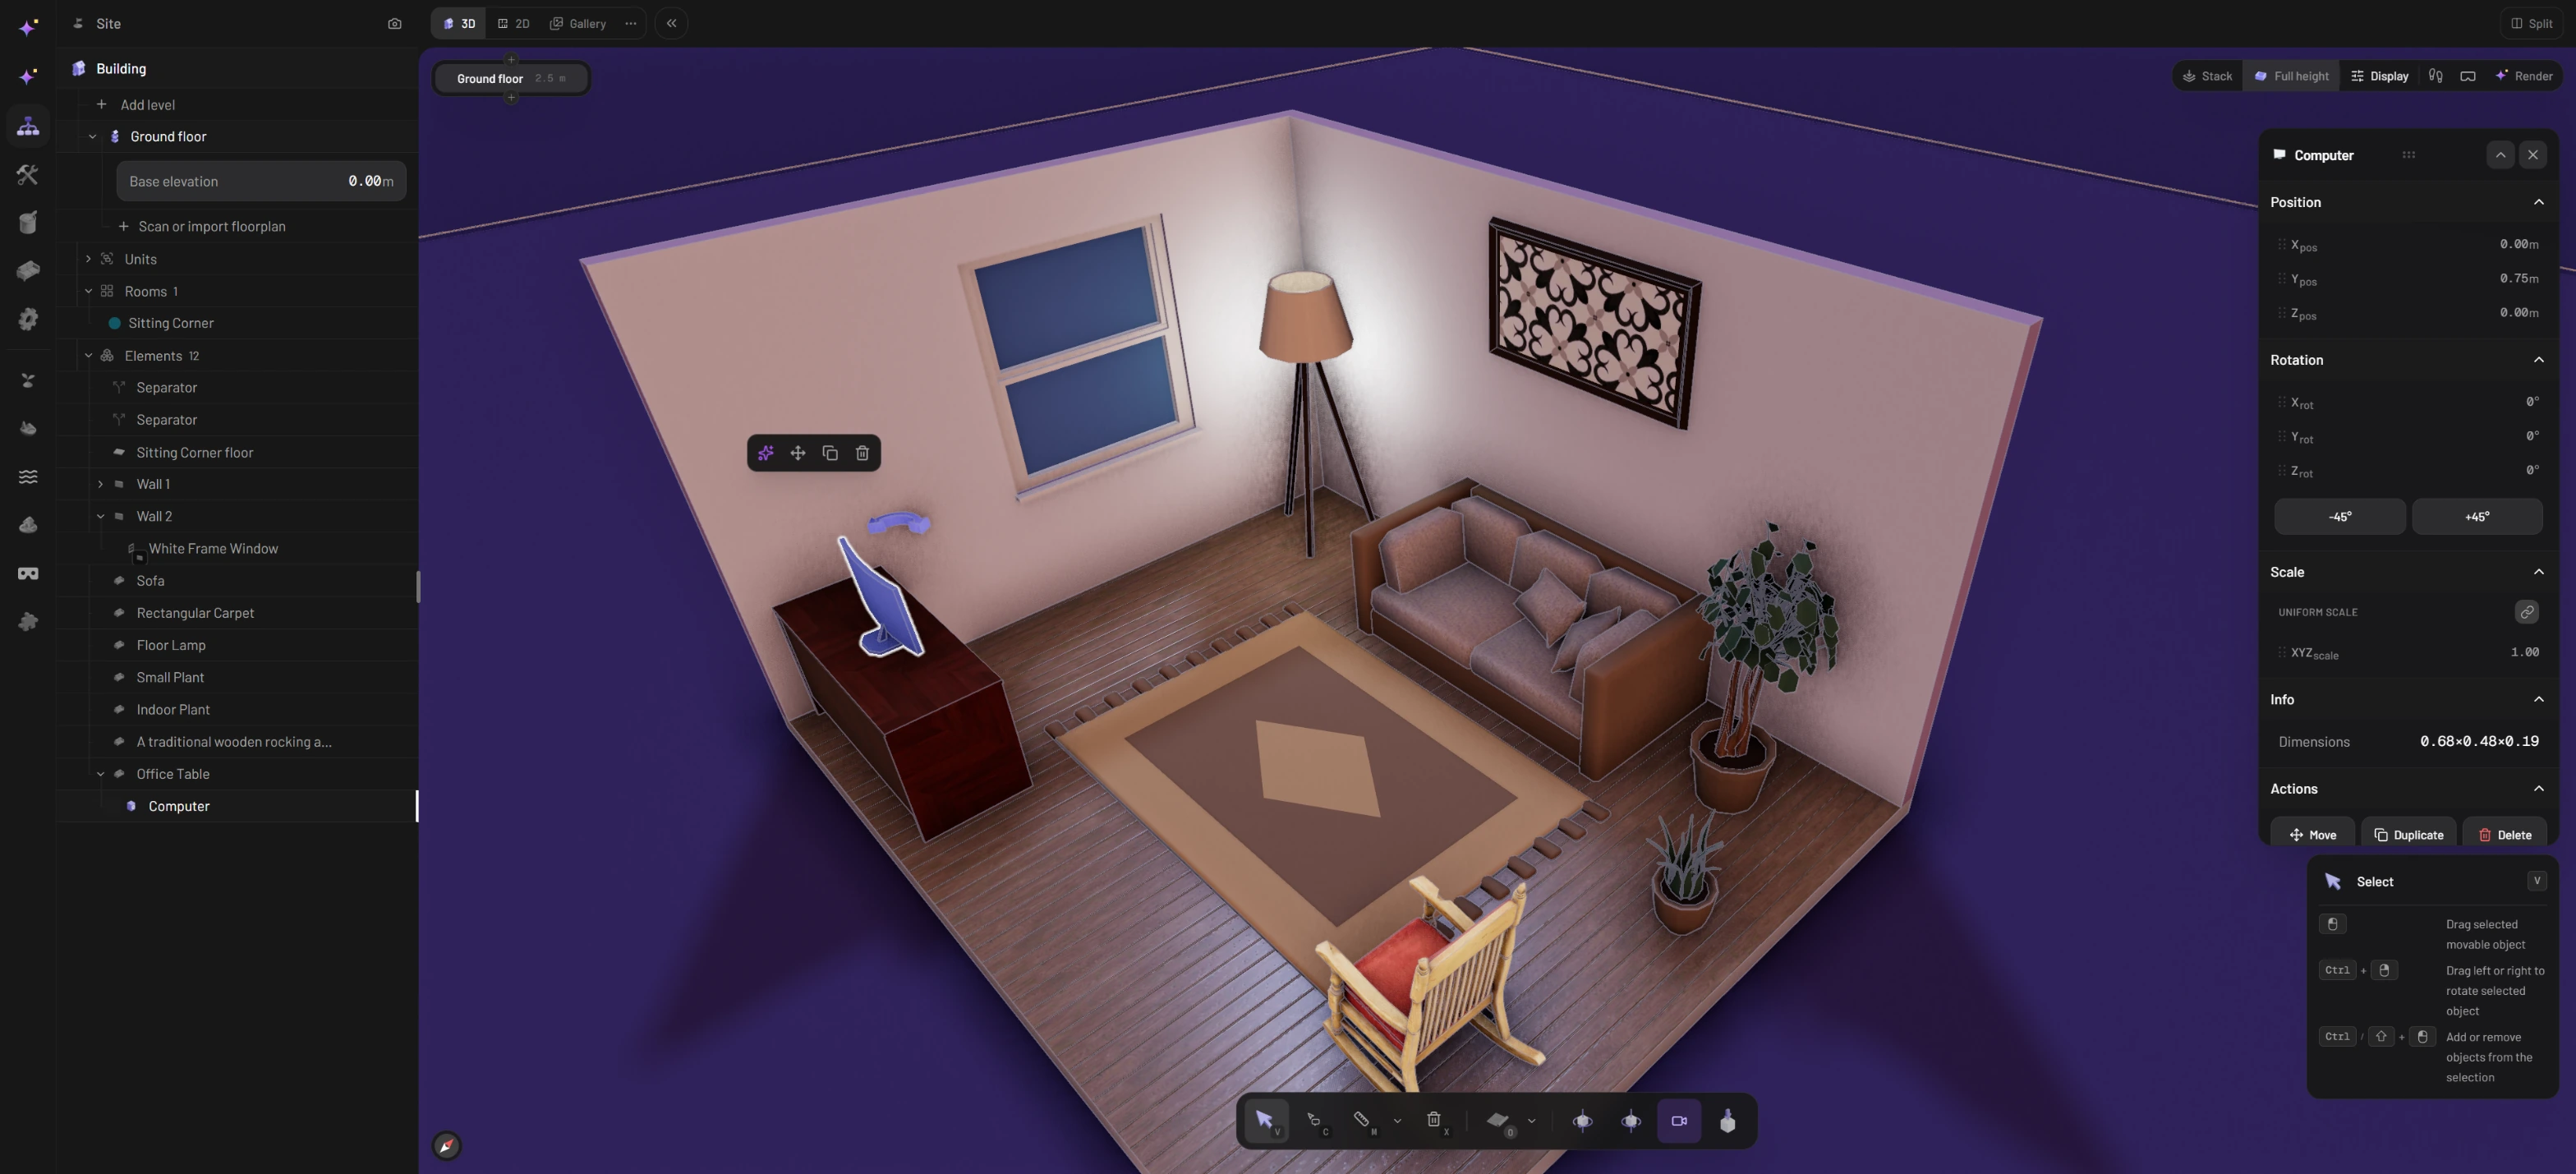
Many items have a usable top: tables, desks, dressers, counters, stools. Move a preview over one and it settles on that surface instead of the floor, which is how you put a vase on the coffee table or a lamp on a bedside table. On a shelf, the item lands on the board you're pointing at.

<figure><img src="https://1629954275-files.gitbook.io/~/files/v0/b/gitbook-x-prod.appspot.com/o/spaces%2F3c2lKXqxOtmrzgrQQpGP%2Fuploads%2Fgit-blob-f3bb5c585fe84498cc6c49b0236b660ed8fc71cd%2Fhosted-items-follow.webp?alt=media" alt="A small plant being placed on the desk next to the monitor, with its footprint shown in green on the desktop and its size in labels"><figcaption><p>Decor placed on a desk or table becomes part of it: move or turn the desk later and what stands on it goes along.</p></figcaption></figure>

Things to know about stacking:

* An item placed on another one is carried by it. When the table moves or turns, everything on it comes along.
* Duplicating the table duplicates what's standing on it too.
* Only floor items can be stacked. Wall and ceiling items always go to their own surface.
* An item has to fit on the surface you're placing it on.
* Stacks can be up to six levels deep.

## Select items

Press `V` for the Select tool (it's the default).

* **Click** an item to select it. Its panel opens and a small action bar appears above it.
* **`Cmd/Ctrl` + click** or **`Shift` + click** adds an item to the selection, or takes it out again.
* **Drag across empty space** to select everything the rectangle touches. Keep `Cmd/Ctrl` or `Shift` held during the drag to keep your current selection and add to it.
* To deselect everything, press `Esc` or click an empty spot.

## Move items

You have several ways to move a selected item. Pick whichever suits the job:

* **Drag it.** Press on the selected item and drag. Snapping and alignment guides work just as they do when placing.
* **Use the move handle.** Next to a selected floor item you'll see a four-way arrow on one side. Press it and drag; the item is dropped where you let go.
* **Pick it up again.** Click **Move** in the action bar or in the item's panel. The item goes back on your cursor, with the same footprint, labels and keys as a fresh placement, until you click to drop it.
* **Type a position.** Use the **Position** sliders in the item's panel (see below).

With several items selected, drag any of them to move the whole selection together.

## Rotate items

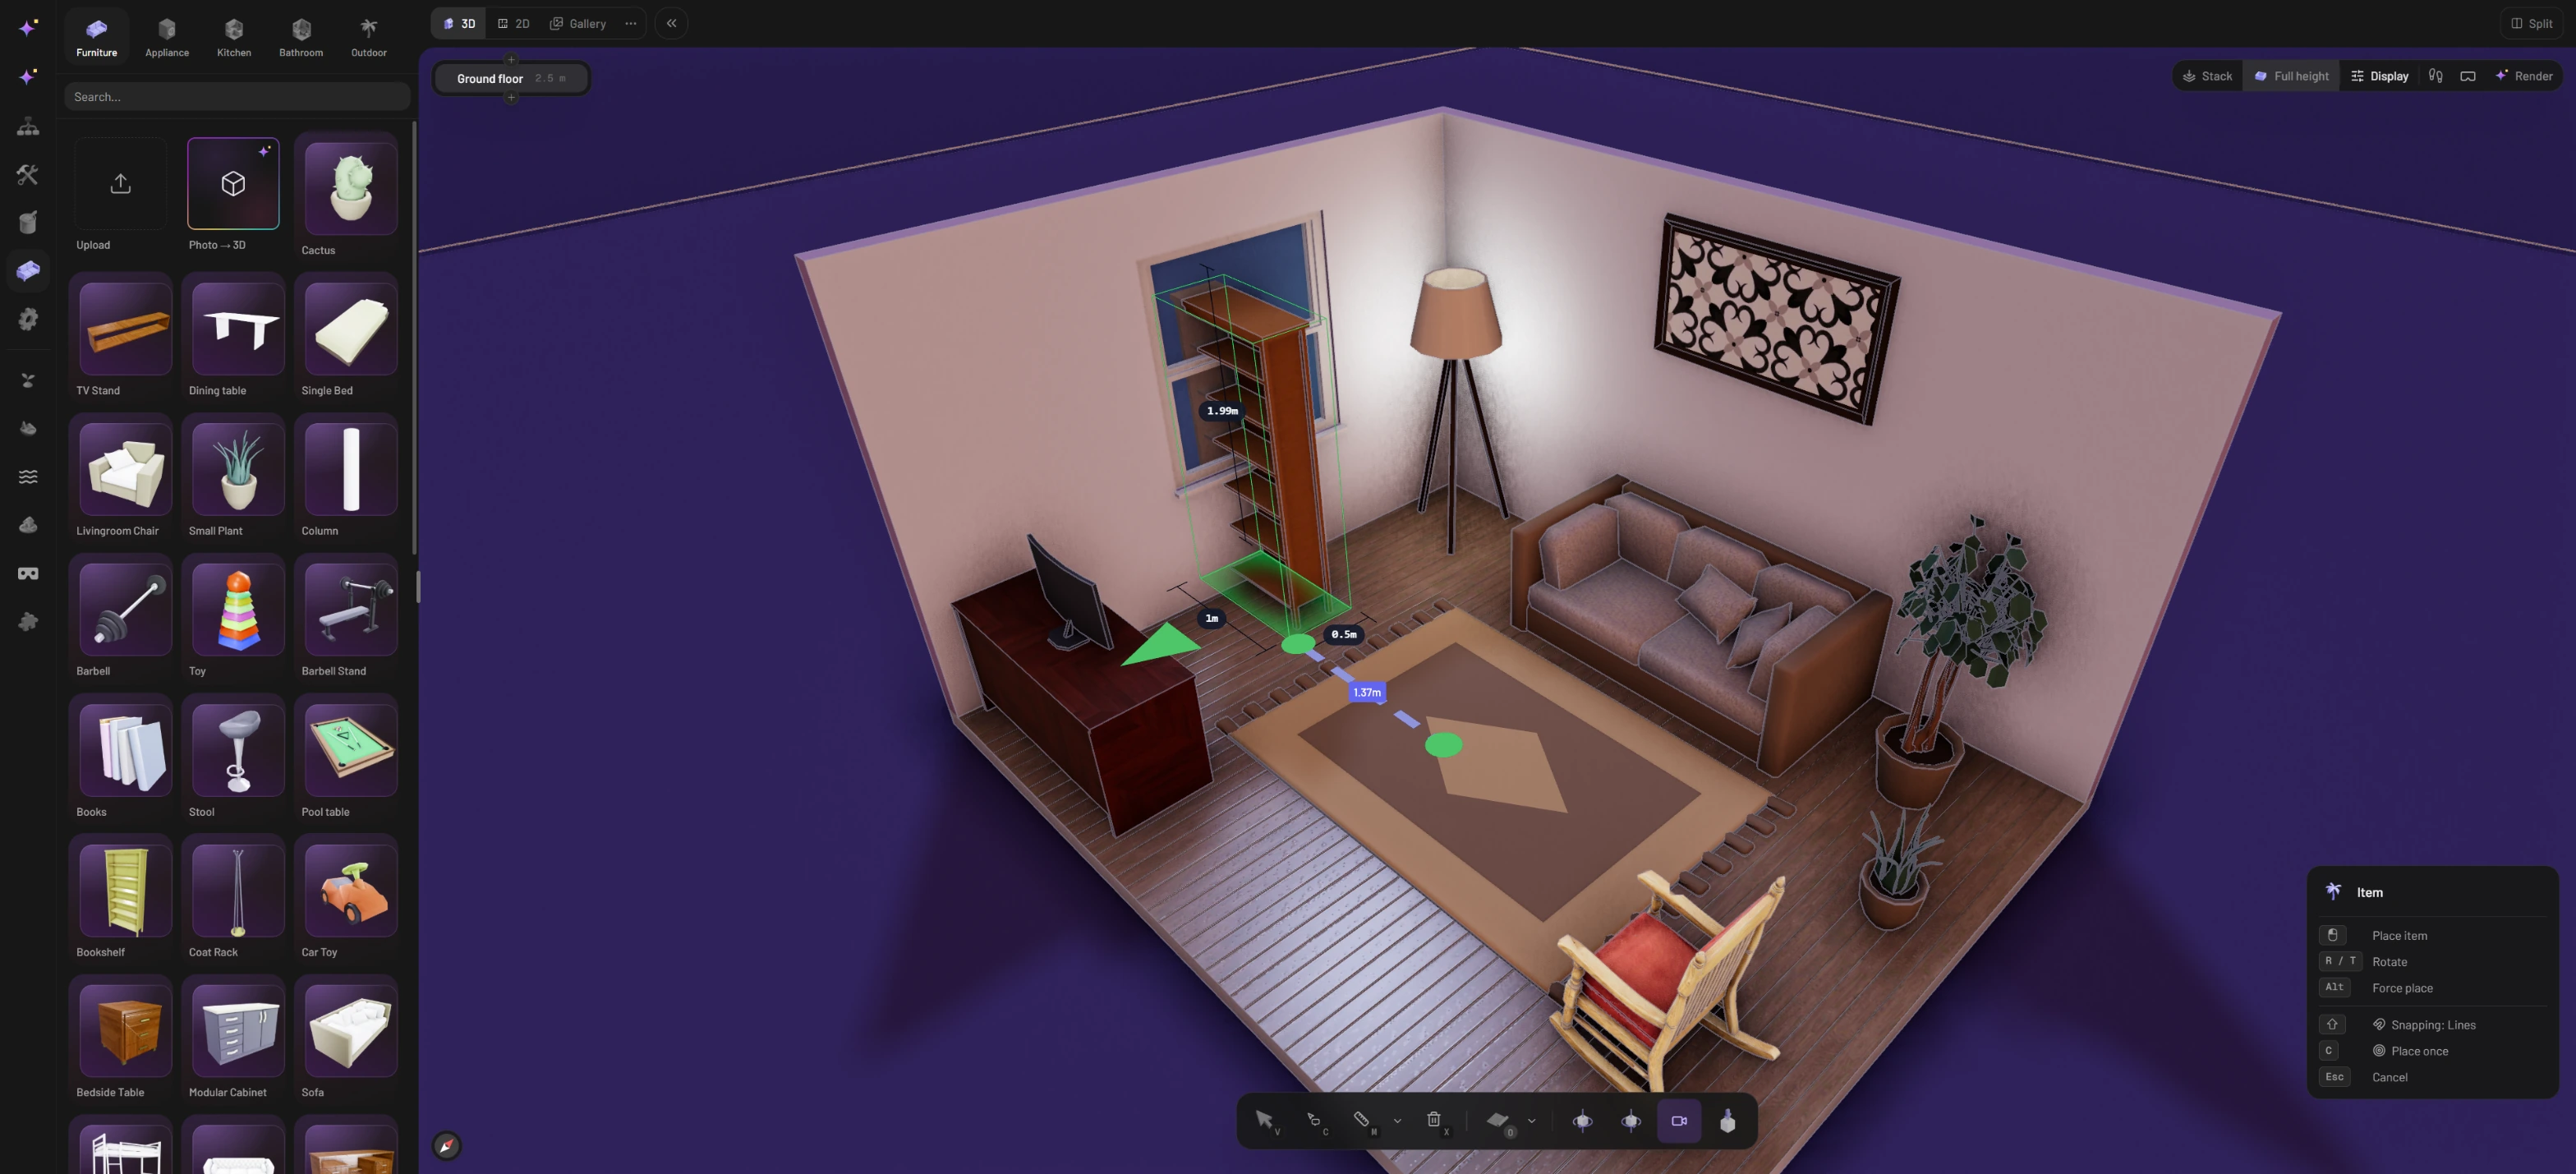
* **Rotation handle:** the curved double arrow on the opposite side of a selected floor item from the move handle. Drag it around; the turn snaps to 15° steps and shows the angle as you go. Hold `Alt` to turn freely.
* **Keys:** `R` and `T` turn the selection 45° at a time. With several items selected, they turn as a group around the middle of the selection.
* **Mouse:** hold `Cmd/Ctrl` and drag left or right with the right mouse button.
* **Panel:** the **Rotation** slider, or the **-45°** and **+45°** buttons.

Wall items get their own pair of handles on the wall face: one spins the item flat against the wall, the other moves it along the wall. Ceiling items have no handles; use **Move** or the panel.

## Fine-tune in the item's panel

Click an item and its panel opens, titled with the item's name.

<figure><img src="https://1629954275-files.gitbook.io/~/files/v0/b/gitbook-x-prod.appspot.com/o/spaces%2F3c2lKXqxOtmrzgrQQpGP%2Fuploads%2Fgit-blob-6c153d78b449df51230b306b5e4fdf6369f56191%2Frotate-handle-properties.webp?alt=media" alt="The computer selected on the desk, with the action bar and rotation handle beside it, and its panel with position, rotation, the -45° and +45° buttons, uniform scale, dimensions and Move, Duplicate and Delete"><figcaption><p>A selected item: the rotation handle beside it, the action bar above it, and its panel with exact values.</p></figcaption></figure>

| Section      | What you can set                                                                                                                                                      |
| ------------ | --------------------------------------------------------------------------------------------------------------------------------------------------------------------- |
| **Position** | `X`, `Y` and `Z` sliders. `Y` lifts the item or lowers it, handy for a shelf-height speaker or a picture hung lower.                                                  |
| **Rotation** | The main turn (`Y`), with **-45°** and **+45°** buttons. Two tilt sliders (`X` and `Z`, -180° to 180°) lean the item, for example to aim a spotlight or tilt a frame. |
| **Scale**    | With **Uniform Scale** linked, one slider resizes the whole item. Unlink it to stretch width, height and depth separately. Values run from 0.01 to 10.                |
| **Info**     | **Dimensions**: the item's real width × height × depth, as it is scaled now.                                                                                          |
| **Actions**  | Buttons for **Move**, **Duplicate** and **Delete**.                                                                                                                   |

Scaling is done in the panel only; the handles in the scene move and rotate.

## Use the action bar

The bar floating above a selected item gives you the common actions without opening anything:

* **Move** picks the item up again.
* **Duplicate** makes a copy and puts it on your cursor.
* **Delete** removes the item (`Delete` / `Backspace`).

Items with a light, such as lamps, also get a **Turn light on** / **Turn light off** button. With a lamp selected, `E` flips the switch as well.

## Duplicate, copy and paste

**Duplicate** (in the action bar or the panel) creates a copy that follows your cursor like a new placement. It only becomes part of the scene when you click; `Esc` throws it away.

The usual clipboard keys work as well:

* `Cmd/Ctrl + C` puts the selected items on the clipboard.
* `Cmd/Ctrl + X` does the same, and takes the items out of the scene.
* `Cmd/Ctrl + V` pastes onto the current level. The pasted items arrive on your cursor so you can drop them where you want them; `Esc` cancels the paste.

Copies keep their materials, and because they travel through your system clipboard, you can paste furniture into another project too.

## Group a selection for now

With several items selected, `Cmd/Ctrl + G` (or the group button in the action bar) groups them so they select and move as one, for example a desk with its chair and lamp. `Cmd/Ctrl + Shift + G` breaks the group up again. These groups last for your current session only.

## Delete items

Select one or more items and press `Delete` or `Backspace`, or click **Delete** in the action bar or the panel. If you delete ten or more things at once, the Studio asks you to confirm first.

## Undo and redo

Made a mess? Each step you take, whether placing, moving, turning, painting or deleting, can be reversed:

* `Cmd/Ctrl + Z` undoes the last step.
* `Cmd/Ctrl + Shift + Z` redoes it.

All shortcuts are listed in [Keyboard shortcuts](/luw.ai-studio/getting-started/keyboard-shortcuts.md).

{% hint style="info" %}
Prefer to describe the layout? Ask [Archiagent.ai](/luw.ai-studio/luw.ai-ai-tools/archiagent.md), for example "put a reading chair and a floor lamp in the corner by the window". You can undo what it changes one step at a time, like your own edits, or take back its whole reply with **Undo this turn**.
{% endhint %}

## Next steps

* [Materials and paint](/luw.ai-studio/items-and-paint/materials-and-paint.md): recolour a sofa or retile a floor.
* [Finding items](/luw.ai-studio/items-and-paint/finding-items.md): browse, search and add models of your own.
* [Screenshots and snapshots](/luw.ai-studio/import-and-export/screenshots.md): capture the finished room.