> For the complete documentation index, see [llms.txt](https://luw-ai.gitbook.io/luw.ai-app-docs/llms.txt). Markdown versions of documentation pages are available by appending `.md` to page URLs; this page is available as [Markdown](https://luw-ai.gitbook.io/luw.ai-app-docs/working-with-images/uploading-images.md).

# Uploading images

How to get a picture into a tool, which files Luw\.ai accepts, and what happens to a photo when it's uploaded.

Most tools start from a picture. This page covers each way to add one, the files you can use, and what Luw\.ai does to a photo as it comes in.

## The upload area

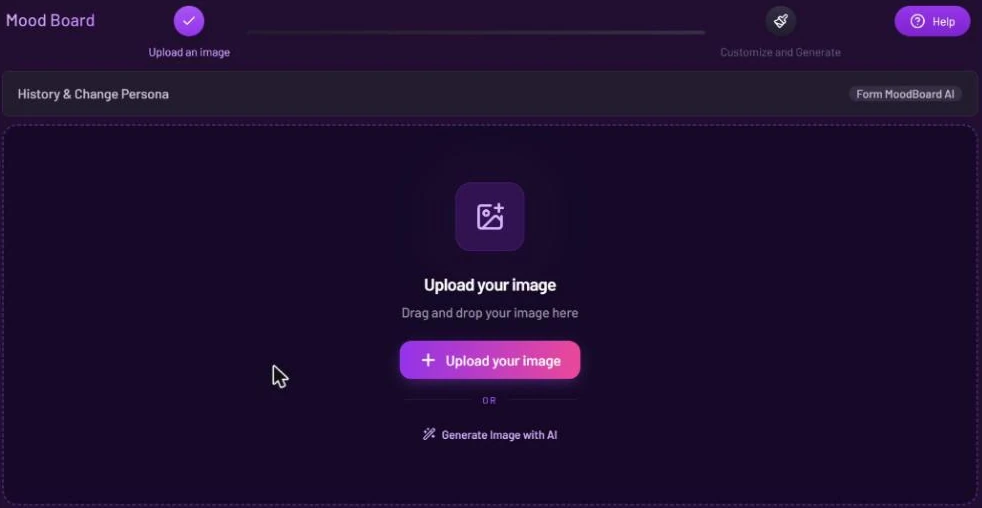
Until you add a photo, the left side of the tool shows an empty upload area: **Upload your image**, "Drag and drop your image here", an **Upload your image** button, "OR", and **Generate Image with AI**.

<figure><img src="https://1930792265-files.gitbook.io/~/files/v0/b/gitbook-x-prod.appspot.com/o/spaces%2F4yESzclcaZeSiIDZ8eIa%2Fuploads%2Fgit-blob-608bed5f0a172a85498f0edf391dbf725d2d0b68%2Fupload-area.webp?alt=media" alt="An empty upload area in Mood Board, with an image icon, the heading Upload your image, the line Drag and drop your image here, an Upload your image button, OR, and a Generate Image with AI link"><figcaption><p>The empty upload area: upload a file or generate a picture</p></figcaption></figure>

From here you can:

* click the area or the **Upload your image** button to open the upload window
* drag a file from your computer and drop it on the area
* choose **Generate Image with AI** to make a picture from a description instead. See [Generate an image to start from](/luw.ai-app-docs/working-with-images/generate-an-image.md).

If you aren't signed in, trying to upload takes you to the sign-in screen first.

## Upload a photo

1. Click the upload area. The upload window opens.
2. Click **Upload** and choose a file. You can also drop a file anywhere on the window, or paste an image with `Ctrl+V` (`Cmd+V` on a Mac) while the window is open.
3. Wait while the bar fills. It reads "Uploading image: N%".

When the upload finishes, the form moves on to the next step by itself.

<figure><img src="https://1930792265-files.gitbook.io/~/files/v0/b/gitbook-x-prod.appspot.com/o/spaces%2F4yESzclcaZeSiIDZ8eIa%2Fuploads%2Fgit-blob-6d0656463b04c4a7abb075f35b0c7077f4b3ae0b%2Fupload-window.webp?alt=media" alt="The upload window with a progress bar reading Uploading image: 97%, Upload and Close buttons on the right, and six example photos under or try with an example"><figcaption><p>No photo to hand? The six examples are the same in every tool</p></figcaption></figure>

| Button                   | What it does                                                                                 |
| ------------------------ | -------------------------------------------------------------------------------------------- |
| **Upload**               | Opens your file picker.                                                                      |
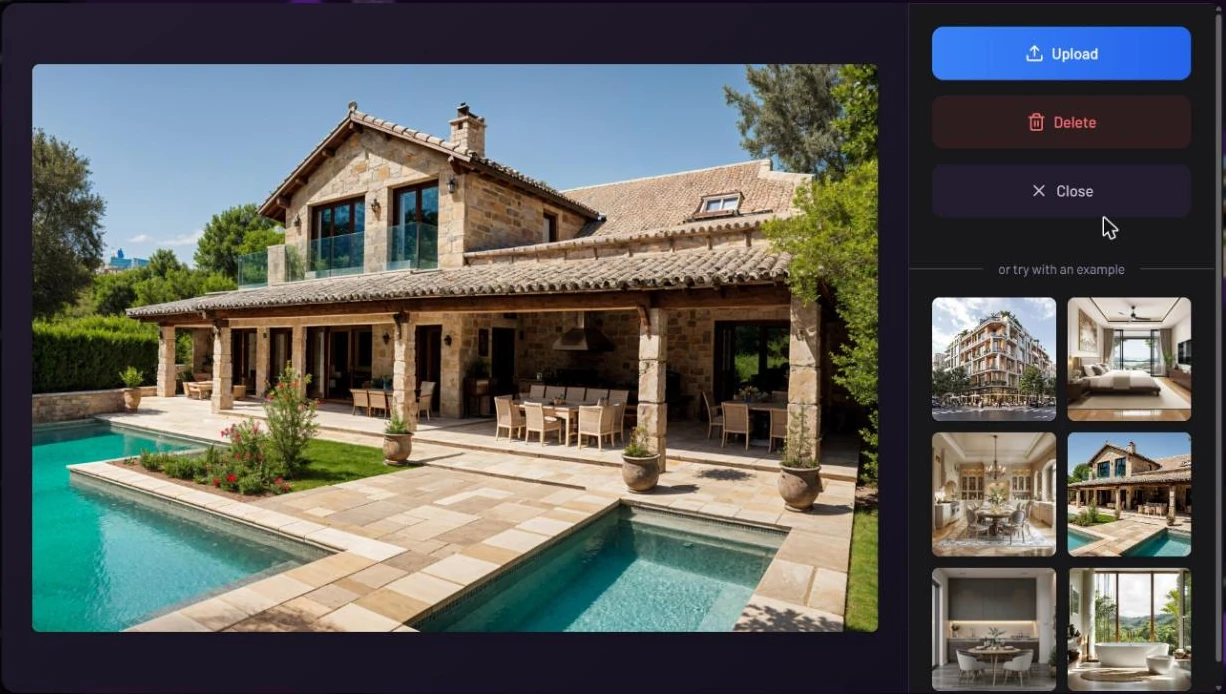
| **Delete**               | Removes the current photo. It only appears when there's a photo, and it asks you to confirm. |
| **Close**                | Closes the window.                                                                           |
| "or try with an example" | Six sample photos. Click one to use it instead of your own picture.                          |

Once a photo is in place, click it (or choose **Settings** in the [image menu](/luw.ai-app-docs/working-with-images/image-menu.md)) to reopen the window. It shows the photo with **Upload**, **Delete** and **Close**, so you can swap it for another file or remove it.

<figure><img src="https://1930792265-files.gitbook.io/~/files/v0/b/gitbook-x-prod.appspot.com/o/spaces%2F4yESzclcaZeSiIDZ8eIa%2Fuploads%2Fgit-blob-84d405c058acbc26b430b31080ea9c8cafed022f%2Fupload-window-delete.webp?alt=media" alt="The upload window showing an uploaded photo of a stone house with a pool, with Upload, Delete and Close buttons and the example photos on the right"><figcaption><p>With a photo uploaded, Delete appears between Upload and Close</p></figcaption></figure>

## Files you can upload

| File                           | What happens                                                                            |
| ------------------------------ | --------------------------------------------------------------------------------------- |
| JPG, PNG, WebP, GIF            | Uploaded directly.                                                                      |
| HEIC                           | Converted to JPG automatically.                                                         |
| SVG                            | Converted to PNG.                                                                       |
| MP4 video                      | Luw\.ai takes the video's last frame and uploads it as the photo.                       |
| GLB, GLTF, OBJ or STL 3D model | The **Frame your 3D model** window opens so you can choose the view to use (see below). |

Files can be up to about 80 MB.

### Upload a 3D model

1. Choose a GLB, GLTF, OBJ or STL file. The **Frame your 3D model** window opens with the line "Rotate, pan and zoom to set the perfect shot."
2. Orbit, pan and zoom until the model looks the way you want.
3. Pick a background colour from the swatches at the top left. The rainbow swatch at the end lets you choose any colour.
4. Click **Use this shot**. That view is uploaded as your photo. **Cancel** closes the window without uploading.

If the file can't be read, the window says "This 3D file couldn't be opened."

## What happens to your photo

Every uploaded photo is prepared the same way:

* It's resized so the long side is at most 2048 px.
* Phone rotation is applied, so the picture is the right way up.
* Photo metadata (EXIF, XMP and IPTC) is removed. That includes any GPS location saved in the photo.
* Files flagged as unsafe are rejected with "Your image has been flagged as NSFW!".

Because of the resize, there's no need to upload very large originals.

## Drop an image straight onto a tool

You don't have to open a tool first:

* On the **Dashboard**, drag an image onto a tool card. That tool opens with your image. Each card also has its own upload button.
* Inside a tool page, drop an image onto a tool's name in the **All Tools** list. That tool opens with the image.

Either way, a loading screen with the tool's name appears, and the image lands in a new persona. See [Personas and history](/luw.ai-app-docs/getting-started/personas.md).

## Add Extra Images

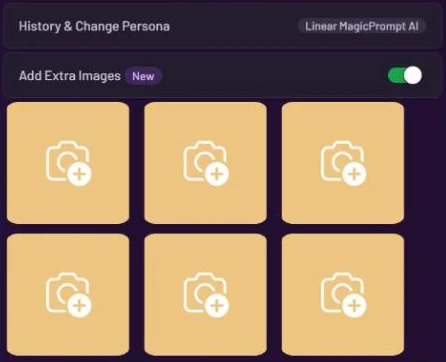
**Add Extra Images** (badge New) is a switch that opens six extra image slots for reference pictures. You'll find it in Magic Prompt (where it's on by default), Interior, Exterior, Render, Mood Board and 3DGen. Click a slot to upload a picture into it, or drop a file onto it.

<figure><img src="https://1930792265-files.gitbook.io/~/files/v0/b/gitbook-x-prod.appspot.com/o/spaces%2F4yESzclcaZeSiIDZ8eIa%2Fuploads%2Fgit-blob-d60bd0017321f463ae5f470b2edbe8fb838a8a2d%2Fextra-images.webp?alt=media" alt="The Add Extra Images switch turned on in Magic Prompt, with six empty image slots below it, each showing a camera icon with a plus sign"><figcaption><p>Six slots for reference pictures</p></figcaption></figure>

What the extra images are used for depends on the tool. In 3DGen they're more angles of the same object; in Mood Board they're the elements of your mood board. See each tool's page for details. If the current persona already has extra images, the slots open by themselves.

## Style Transfer

In Interior, Exterior, Sketch and Change Background, the **Style Transfer** switch adds a slot called "Add Photo for Style Transfer". Upload a picture whose look you want, and the style comes from that photo.

While Style Transfer is on, the prompt, **Styles**, extra images, **Prompt Enhancer**, **Visual Strength** and **Fill Empty Room** are hidden, because the reference photo takes their place.

## Related

* [Generate an image to start from](/luw.ai-app-docs/working-with-images/generate-an-image.md)
* [The image menu](/luw.ai-app-docs/working-with-images/image-menu.md)
* [Smart suggestions](/luw.ai-app-docs/working-with-images/smart-suggestions.md)
* [Personas and history](/luw.ai-app-docs/getting-started/personas.md)