> For the complete documentation index, see [llms.txt](https://luw-ai.gitbook.io/luw.ai-app-docs/llms.txt). Markdown versions of documentation pages are available by appending `.md` to page URLs; this page is available as [Markdown](https://luw-ai.gitbook.io/luw.ai-app-docs/edit-images/magic-wand-ai.md).

# Magic Wand AI

Change one part of a photo by marking the area and then applying a material, generating something new from a prompt, or removing it.

Magic Wand AI changes one part of a photo and leaves the rest alone. You mark the area, then replace it with a material, generate something new from a prompt, or remove what's there.

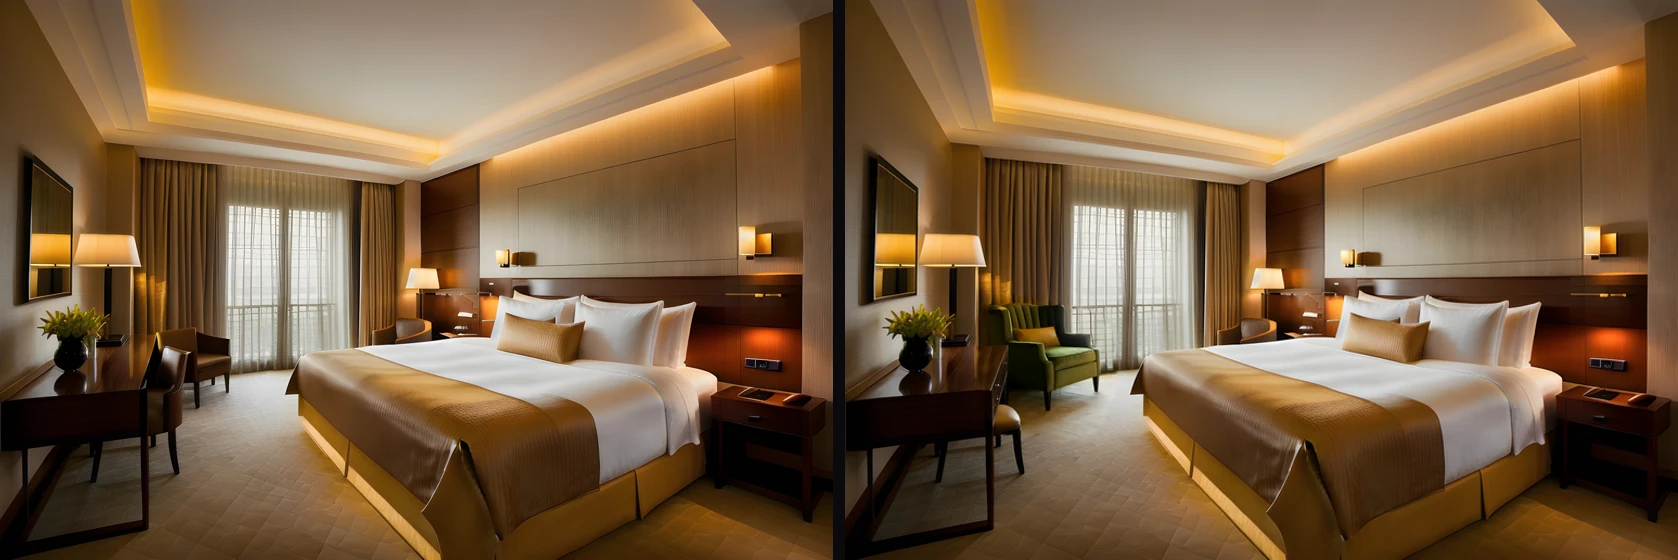
<figure><img src="https://1930792265-files.gitbook.io/~/files/v0/b/gitbook-x-prod.appspot.com/o/spaces%2F4yESzclcaZeSiIDZ8eIa%2Fuploads%2Fgit-blob-ac024869d370d53e92613a05b4bac6cfed287392%2Fmagic-wand-result.webp?alt=media" alt="Two versions of the same hotel bedroom side by side: on the left the original with a brown armchair by the window, on the right the same room where that armchair is now a green velvet armchair"><figcaption><p>Before and after: the armchair painted in the selection step became "a green velvet armchair"; the rest of the room stays the same.</p></figcaption></figure>

## What you need

* A photo. See [Uploading images](/luw.ai-app-docs/working-with-images/uploading-images.md) for the file types you can use.
* An idea of what should change in one area: a new object, a new material, or nothing at all (removal).

## Edit part of a photo

Magic Wand works in three steps: **Upload an image** → **Select editing area** → **Customize and Generate**.

1. Open **Magic Wand** from the Dashboard or from **All Tools** (app.luw\.ai/magicwand).
2. Upload your photo. The form moves on to **Select editing area** by itself.
3. Mark the area you want to change (see below), then press **Continue**.
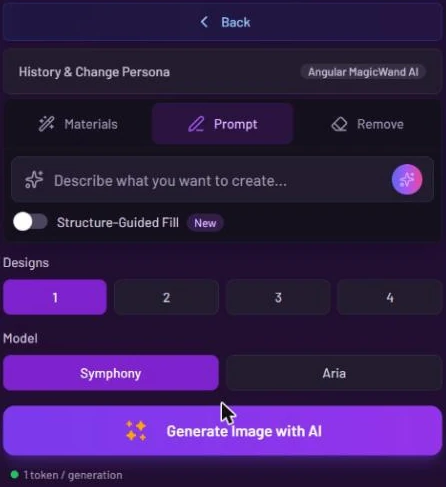
4. Choose what happens to the area: **Materials**, **Prompt** or **Remove**.
5. Choose the number of **Designs** and the **Model**.
6. Press **Generate Image with AI**. Your results appear in **Latest Designs** below the form.

### Mark the area

The selection step opens on the **Brush Tool** tab. Paint over the object you want to change. Under **Brush Type** you can switch between **Circle**, **Lasso** (click points around the object, then close the shape), **Square** and **Eraser**, and set the **Brush Size** with − and +.

<figure><img src="https://1930792265-files.gitbook.io/~/files/v0/b/gitbook-x-prod.appspot.com/o/spaces%2F4yESzclcaZeSiIDZ8eIa%2Fuploads%2Fgit-blob-3b070ebd2e2bf2c15d638144634492370bf9de81%2Fmagic-wand-brush.webp?alt=media" alt="Select editing area step with the Brush Tool tab: an armchair in a hotel bedroom painted white with the Circle brush, Brush Type options Circle, Lasso, Square and Eraser, Brush Size 50, Remove, Clear, undo, redo and Continue"><figcaption><p>The armchair painted over with the Circle brush.</p></figcaption></figure>

Use **Clear** to wipe your drawing and start again. Undo and redo are next to it. The **Automatic** tab can find objects for you with **Magic Select** or **Prompt & Select**. [Selecting an area](/luw.ai-app-docs/working-with-images/selecting-an-area.md) explains every selection tool.

{% hint style="warning" %}
**Remove** in the brush panel clears your drawing **and** removes your uploaded photo. It asks you to confirm first. To start the drawing over, use **Clear**.
{% endhint %}

### Choose what happens to the area

After **Continue**, the settings step opens with three tabs. **Back** at the top returns you to the selection.

<figure><img src="https://1930792265-files.gitbook.io/~/files/v0/b/gitbook-x-prod.appspot.com/o/spaces%2F4yESzclcaZeSiIDZ8eIa%2Fuploads%2Fgit-blob-81e15d6c13476f43c1338d8a61d43200ec14421e%2Fmagic-wand-prompt-panel.webp?alt=media" alt="Magic Wand settings step: Back, History &#x26; Change Persona, tabs Materials, Prompt and Remove, a prompt box reading Describe what you want to create, the Structure-Guided Fill switch with a New badge, Designs and Model"><figcaption><p>The Prompt tab, with the Structure-Guided Fill switch under the prompt box.</p></figcaption></figure>

**Prompt**: describe what should appear in the area in the box "Describe what you want to create…". Turn on **Structure-Guided Fill** to keep the structure of the selected area, for example when you want a new look for an object without changing its shape.

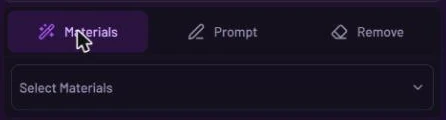
**Materials**: open **Select Materials** and pick a material. Your choice is written into the prompt for you.

<figure><img src="https://1930792265-files.gitbook.io/~/files/v0/b/gitbook-x-prod.appspot.com/o/spaces%2F4yESzclcaZeSiIDZ8eIa%2Fuploads%2Fgit-blob-e529465908df2b76399e6e61012cf876ec1cb9b6%2Fmagic-wand-materials.webp?alt=media" alt="Materials tab selected with a Select Materials dropdown below it"><figcaption><p>Pick a material for the selected area.</p></figcaption></figure>

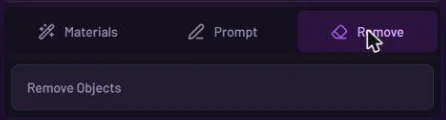
**Remove**: choose **Remove Objects** to take out whatever you selected.

<figure><img src="https://1930792265-files.gitbook.io/~/files/v0/b/gitbook-x-prod.appspot.com/o/spaces%2F4yESzclcaZeSiIDZ8eIa%2Fuploads%2Fgit-blob-17a4e6bab95ed206518dea39e62faf39aea09a00%2Fmagic-wand-remove.webp?alt=media" alt="Remove tab selected with Remove Objects below it"><figcaption><p>Remove clears the selected area.</p></figcaption></figure>

## Settings

| Setting                      | What it does                                                                                                               |
| ---------------------------- | -------------------------------------------------------------------------------------------------------------------------- |
| **Back**                     | Returns to the selection step.                                                                                             |
| **History & Change Persona** | Switches to another persona or starts a new one. See [Personas and history](/luw.ai-app-docs/getting-started/personas.md). |
| **Materials**                | Applies a material from **Select Materials** to the selected area.                                                         |
| **Prompt**                   | Generates what you describe inside the selected area.                                                                      |
| **Structure-Guided Fill**    | Keeps the structure of the selected area while it's filled.                                                                |
| **Remove**                   | Removes the objects in the selected area.                                                                                  |
| **Designs**                  | How many results to make: 1, 2, 3 or 4. The free plan makes 1.                                                             |
| **Model**                    | **Symphony** (default) or **Aria**. Both cost the same.                                                                    |

## Credits

Each design uses 1 credit ("1 token / generation"). **Magic Select** and **Prompt & Select** use 1 credit each time you run them.

## Tips

* Cover the whole object with the brush. If you press Generate with nothing selected, or with the whole image selected, you'll see "No area selected. Use the brush to mark where you want changes."
* For a quick edit without leaving another tool, use the wand icon on any uploaded photo: its **Magic Wand** option opens a pop-up editor. See [The image menu](/luw.ai-app-docs/working-with-images/image-menu.md).
* On a finished result, **AI-Powered Magic Edit** → **Magic Wand AI** does the same in the result viewer.
* To change the whole photo with words instead of one area, use [Magic Prompt AI](/luw.ai-app-docs/edit-images/magic-prompt-ai.md).

## Related

* [Selecting an area](/luw.ai-app-docs/working-with-images/selecting-an-area.md)
* [The image menu](/luw.ai-app-docs/working-with-images/image-menu.md)
* [Magic Prompt AI](/luw.ai-app-docs/edit-images/magic-prompt-ai.md)
* [Edit and reuse a result](/luw.ai-app-docs/results/edit-and-reuse.md)