> For the complete documentation index, see [llms.txt](https://luw-ai.gitbook.io/luw.ai-app-docs/llms.txt). Markdown versions of documentation pages are available by appending `.md` to page URLs; this page is available as [Markdown](https://luw-ai.gitbook.io/luw.ai-app-docs/edit-images/expand-ai.md).
# Expand
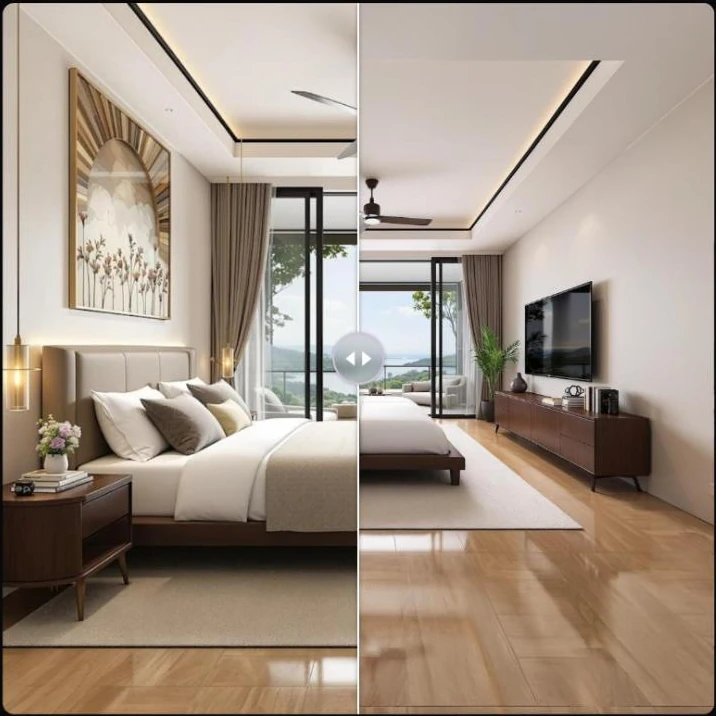
Widen a photo that's cropped too tightly; Expand adds new picture on every side, like a wide-angle lens.
Expand widens a photo that's cropped too tightly. It adds new picture around the edges, generating the missing structural elements and design details, like shooting with a wide-angle lens. It's built with architectural photos in mind.
The bedroom widened on both sides.
## What you need
* A photo you'd like to show more of. See [Uploading images](/luw.ai-app-docs/working-with-images/uploading-images.md) for the file types you can use.
* Nothing else: there's no prompt to write.
## Widen a photo
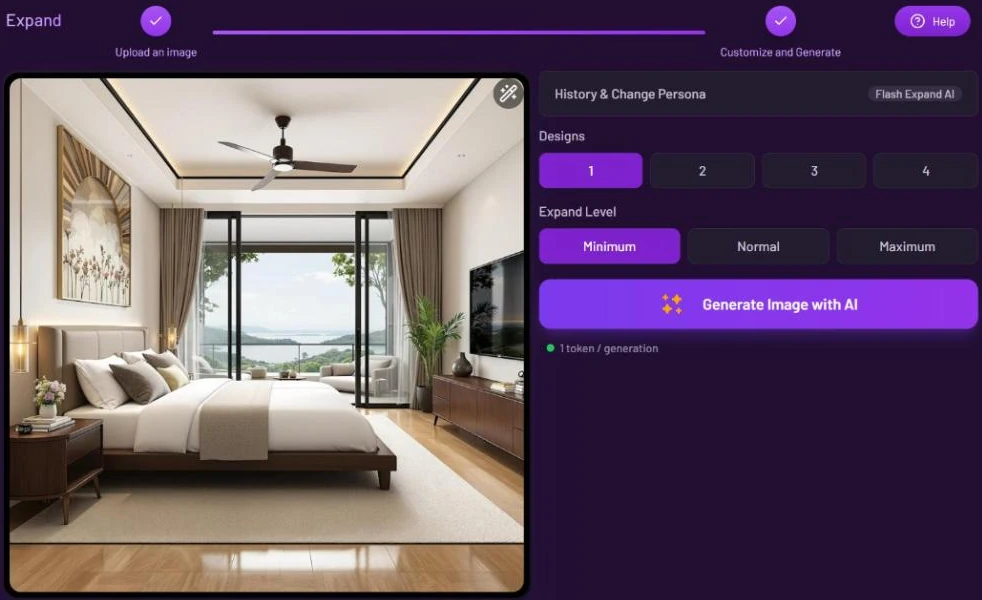
1. Open **Expand** from the Dashboard or from **All Tools** (app.luw\.ai/expand-ai).
2. Upload your photo. When the upload finishes, the form moves to **Customize and Generate** by itself.
3. Choose the number of **Designs** and the **Expand Level**.
4. Press **Generate Image with AI**. Your results appear in **Latest Designs** below the form. Click one to open it in the [result viewer](/luw.ai-app-docs/results/result-viewer.md) and compare it with the original.
Expand Level sets how much new picture is added.
## Settings
| Setting | What it does |
| ---------------------------- | ----------------------------------------------------------------------------------------------------------------------------- |
| **History & Change Persona** | Switches to another persona or starts a new one. See [Personas and history](/luw.ai-app-docs/getting-started/personas.md). |
| **Designs** | How many results to make: 1, 2, 3 or 4. The free plan makes 1. |
| **Expand Level** | How far the photo is extended on all four sides: **Minimum** (default) adds the least, **Normal** more, **Maximum** the most. |
## Credits
Each design uses 1 credit ("1 token / generation"). Making several designs multiplies the cost.
## Tips
* Start with **Minimum**. Higher levels add more new picture, so more of the result is invented rather than taken from your photo.
* Make 2 to 4 designs and keep the one whose new edges look most natural.
* If a detail in the new area isn't right, fix it with [Magic Wand AI](/luw.ai-app-docs/edit-images/magic-wand-ai.md).
* You can widen a result from another tool too: open it and choose **Open with…** → **Expand**.
## Related
* [Magic Wand AI](/luw.ai-app-docs/edit-images/magic-wand-ai.md)
* [Photo Enhancer](/luw.ai-app-docs/edit-images/photo-enhancer.md)
* [Edit and reuse a result](/luw.ai-app-docs/results/edit-and-reuse.md)
* [Uploading images](/luw.ai-app-docs/working-with-images/uploading-images.md)